Buy Us A Coffee

As we delve more into content creation for our youtube channel, we’ve decided to open a donation option for those who may not necessarily be a client but would still like to show some love ❤️

So if one of our videos or blogs has really helped you out and you’d like to show support, welp, now you have an option to Buy Me A Coffee ☕️😁

Of course all donations, big or small, are greatly appreciated and help us to keep pumping out great content for you.

Cheers.

Install Zabbix 6.4 On Ubuntu Server 22.04.1 In Under 10 Minutes

This guide will assume you have a working Ubuntu Server already installed with SSH enabled and ready to go. If you need help with installing Ubuntu server, refer here

If you’re more visual and prefer to watch an installation walk through, refer here

Aside from that, lets jump straight into installing Zabbix 6.4 PRE-RELEASE on top of Ubuntu Server 22.04.1 which as  the time of this writing, is latest and greatest versions of both ->

1. Install ubuntu server 22.04.1 and enable ssh

2. SSH to your Ubuntu server to run install commands

3. Install and configure Zabbix for your platform

Run the following cmds:

sudo wget https://repo.zabbix.com/zabbix/6.3/ubuntu/pool/main/z/zabbix-release/zabbix-release_6.3-3%2Bubuntu22.04_all.deb
sudo dpkg -i zabbix-release_6.3-3+ubuntu22.04_all.deb
sudo apt update 
sudo apt install zabbix-server-mysql zabbix-frontend-php zabbix-apache-conf zabbix-sql-scripts zabbix-agent

4. Install sql server

sudo apt-get install mysql-server
sudo systemctl start mysql

5. Create initial database

sudo mysql
create database zabbix character set utf8mb4 collate utf8mb4_bin;
create user zabbix@localhost identified by 'password';
grant all privileges on zabbix.* to zabbix@localhost;
set global log_bin_trust_function_creators = 1;
quit;

6. On Zabbix server host import initial schema and data. You will be prompted to enter your newly created password.

sudo zcat /usr/share/zabbix-sql-scripts/mysql/server.sql.gz | mysql --default-character-set=utf8mb4 -uzabbix -p zabbix

7. Disable log_bin_trust_function_creators option after importing database schema.

sudo mysql
set global log_bin_trust_function_creators = 0;
quit;

8. Configure the database for Zabbix server

Edit file /etc/zabbix/zabbix_server.conf and set the DB password with ->

sudo vim /etc/zabbix/zabbix_server.conf

9. Start Zabbix server and agent processes

systemctl restart zabbix-server zabbix-agent apache2
systemctl enable zabbix-server zabbix-agent apache2

10. Open Zabbix UI web page and proceed with web ui config (should be self explanatory)

The default URL for Zabbix UI when using Apache web server is http://host/zabbix

Video walk through ->

Questions, comments, concerns? Feel free to contact us @ [email protected] Always glad to help.


‘Code-Red’ Mini ITX Gaming PC Build

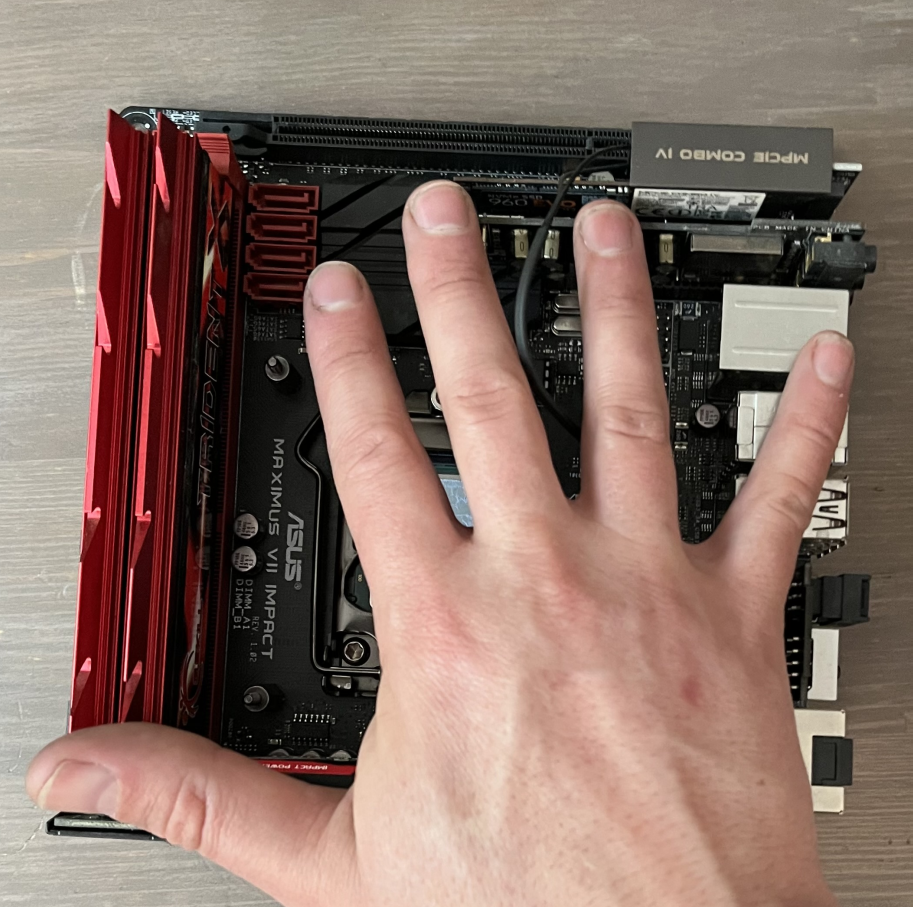
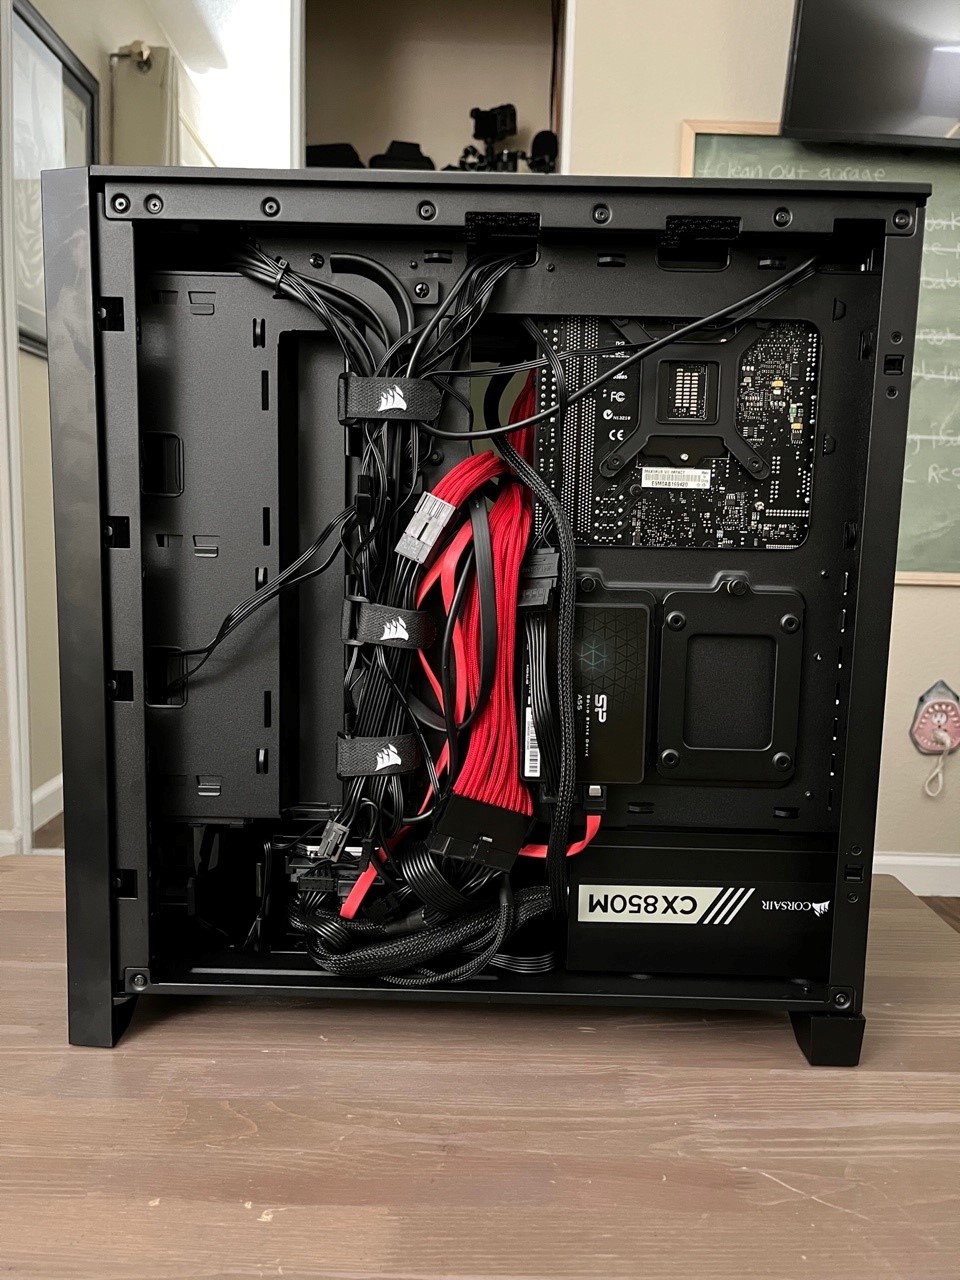
We gathered some older yet great condition, high performing computer components we had laying around the shop and built a budget mini ITX gaming computer for a client. Yes the motherboard is very cute, basically smaller than my hand and I have small hands ->

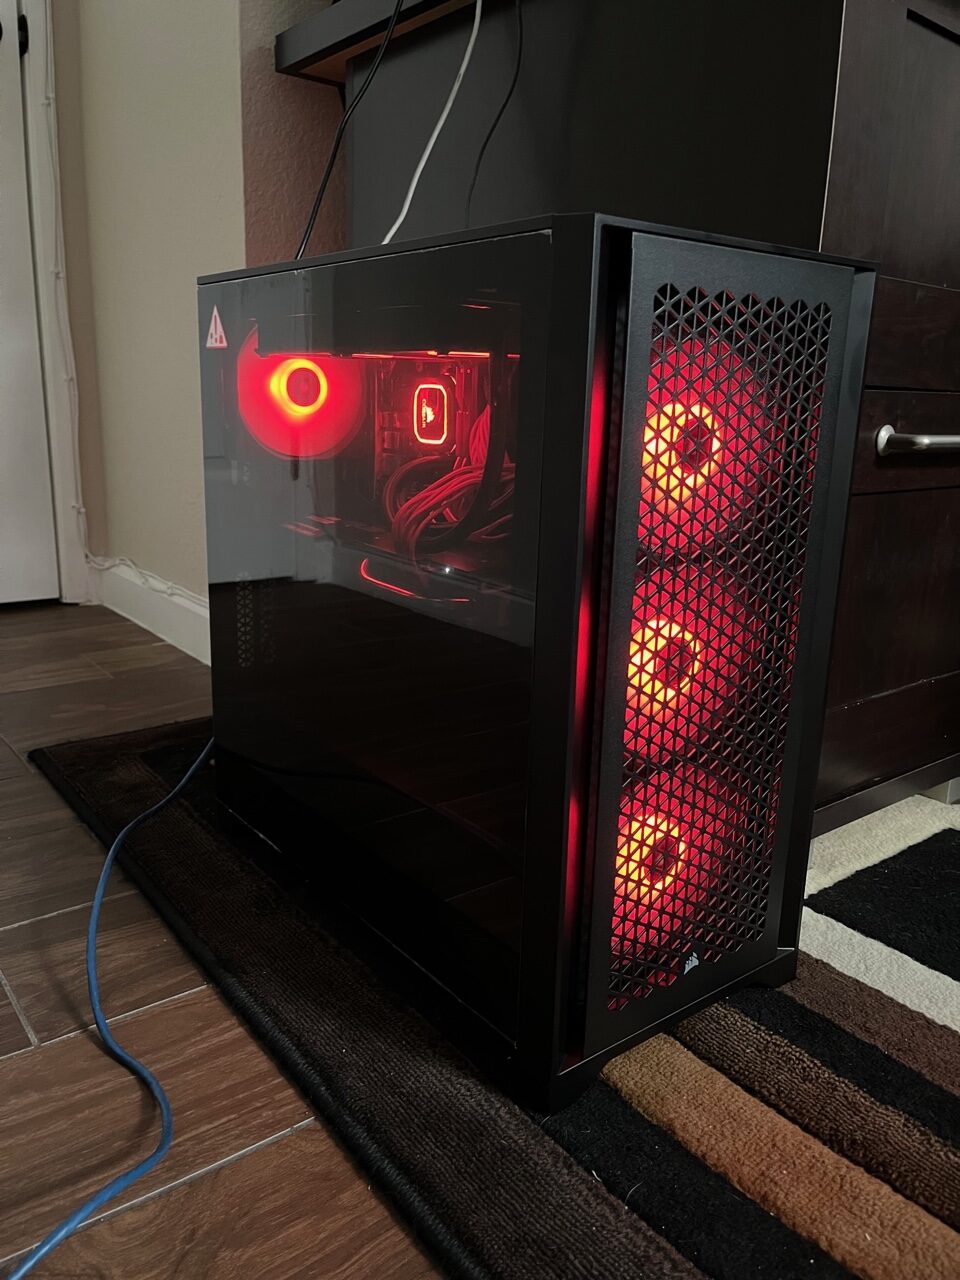
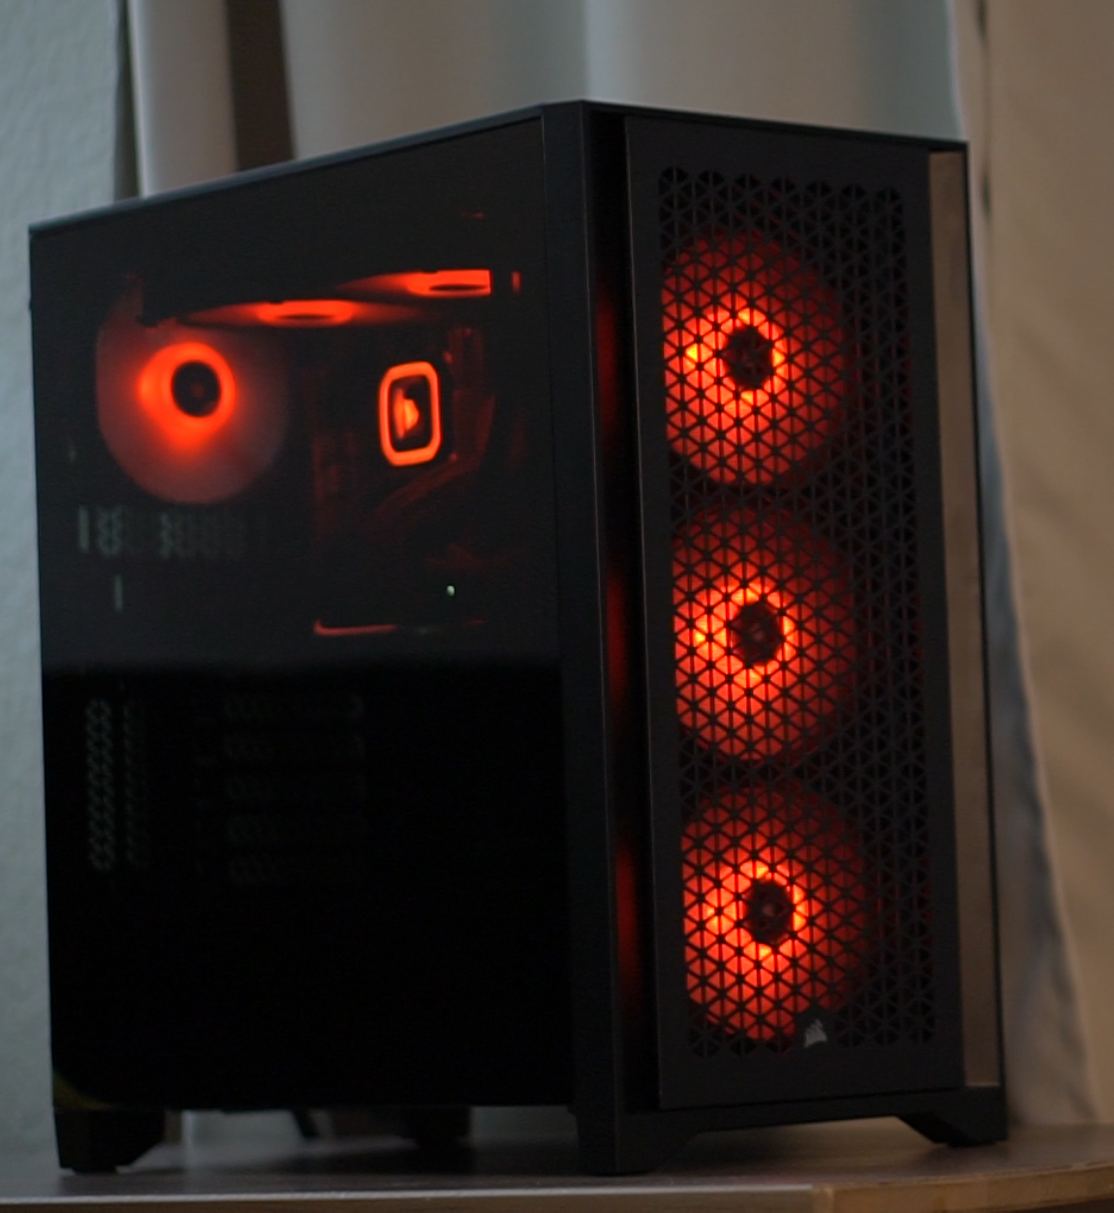
These parts are about 8 years old but were high performing parts at the time + lightly used thus they have aged like fine wine and can still hang with the best of them even in todays world of high demanding graphic intensive game titles. The build came out very nice and clean and due to the red & black color scheme, we decided to call the PC ‘Code-Red’ ->


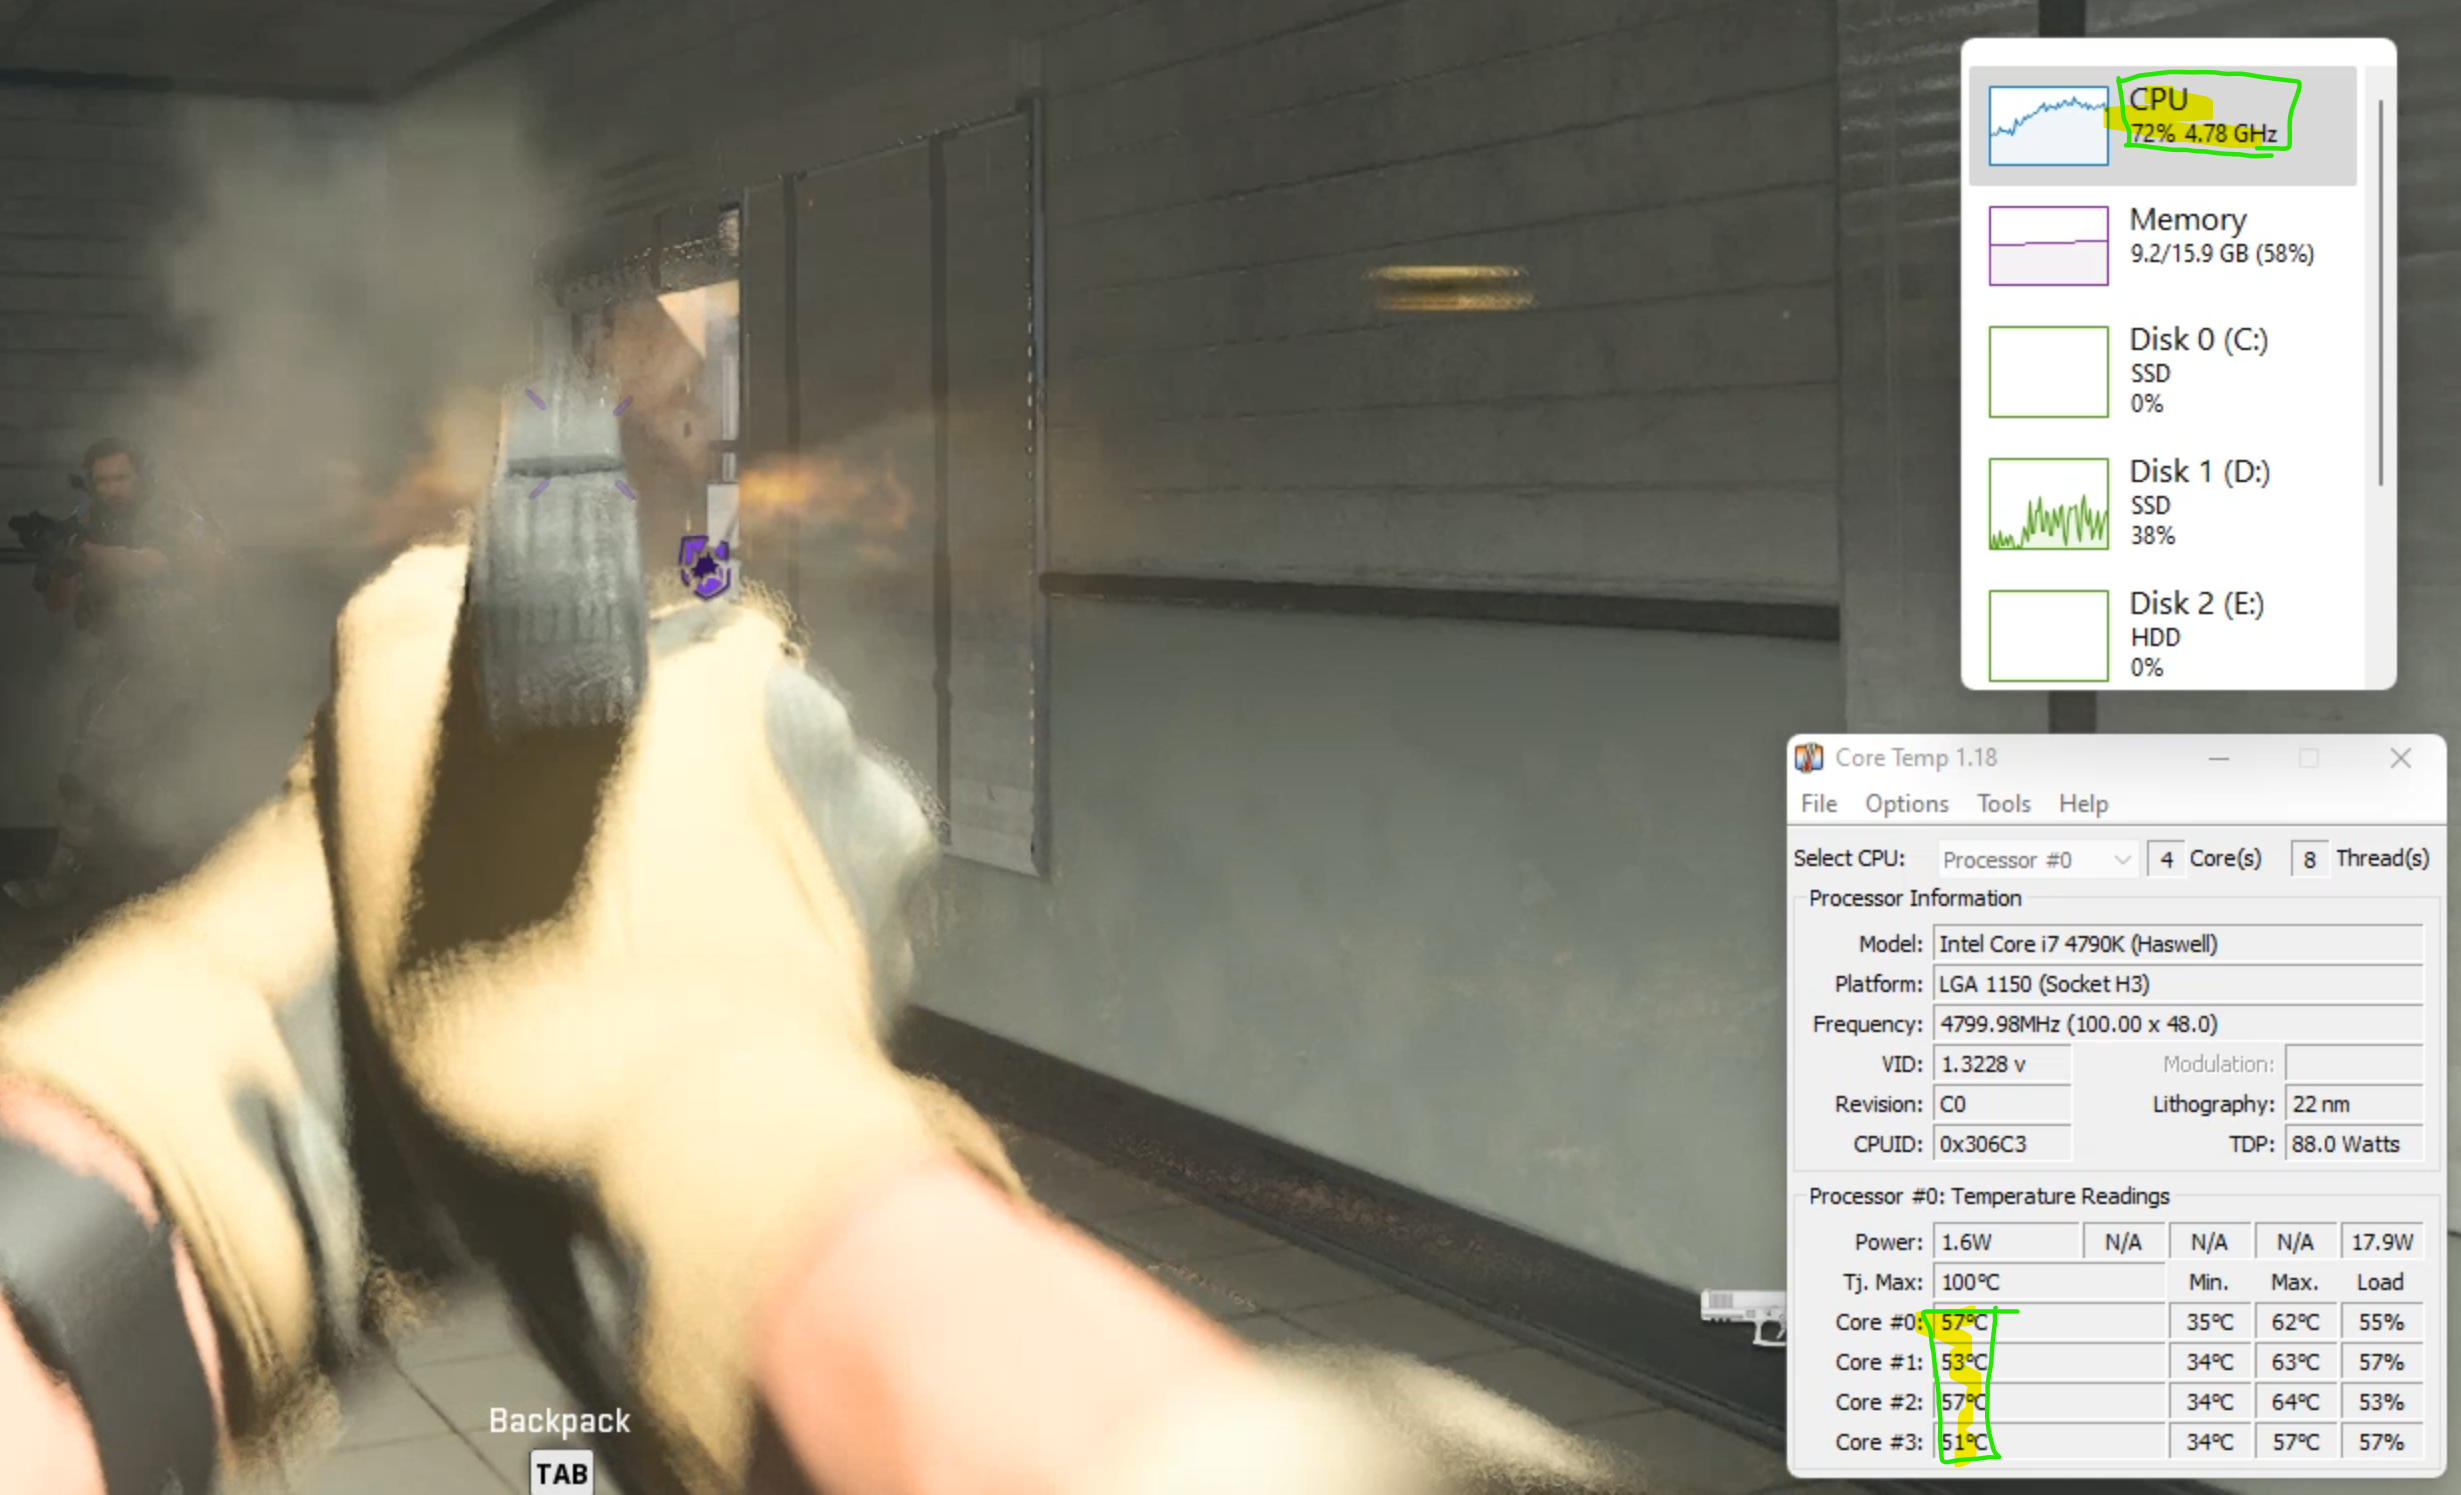
We successfully overclocked the robust i7 4790k (Devils Canyon) CPU to 4.8GHz and put it to the test. ‘Code-Red’ boots up in about 15 seconds and achieved some respectable numbers – able to run ‘COD MWII’ no problem, averaging around, temp 50-65c, 65-75% CPU usage while under load and around  65-75fps on high graphics settings in 1080p ->

To be fair, we should mention some of the more significant ‘negatives’ here with this build ->

Limited scalability  – The PC is basically maxed out and there is very little room for upgrades down the line. That being said, there is plenty of room to upgrade the graphics card and you could also opt for a faster RAM kit

No 4k gaming support out of the box – Good news is, GPU upgrade is supported by ‘Code-Red’. Slapping a GTX 1080ti or something of similar spec should make a 4k gaming experience achievable with this build

CPU has low quantity of cores – While the CPU is very fast (OC 4.8GHz), unfortunately it is only a Quad core processor and more cores would be nice

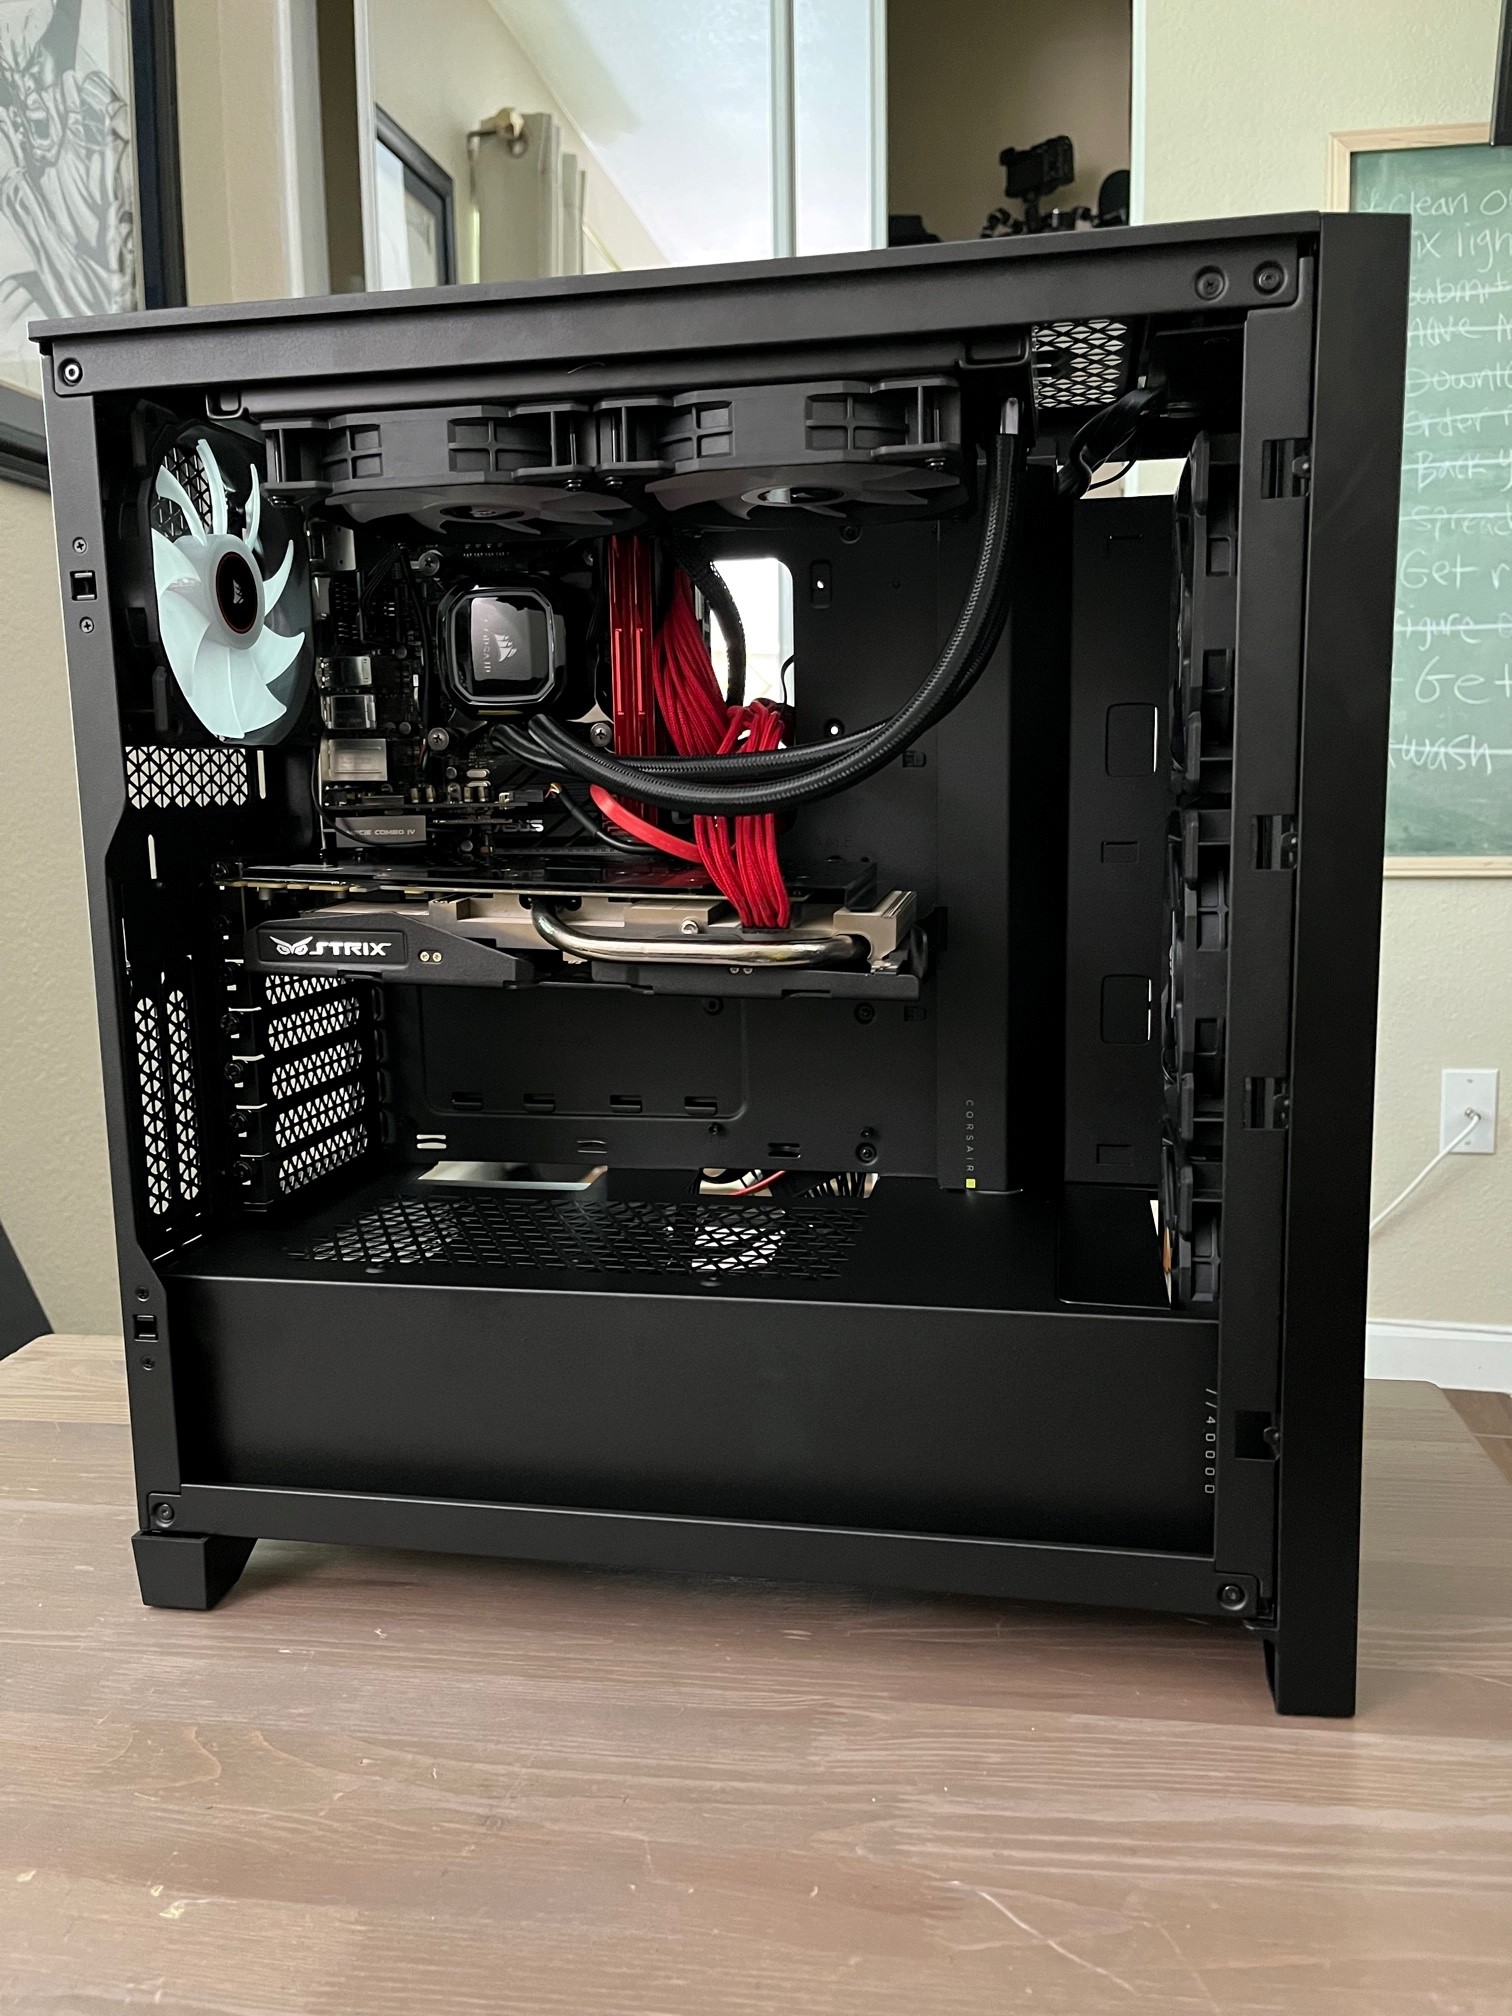
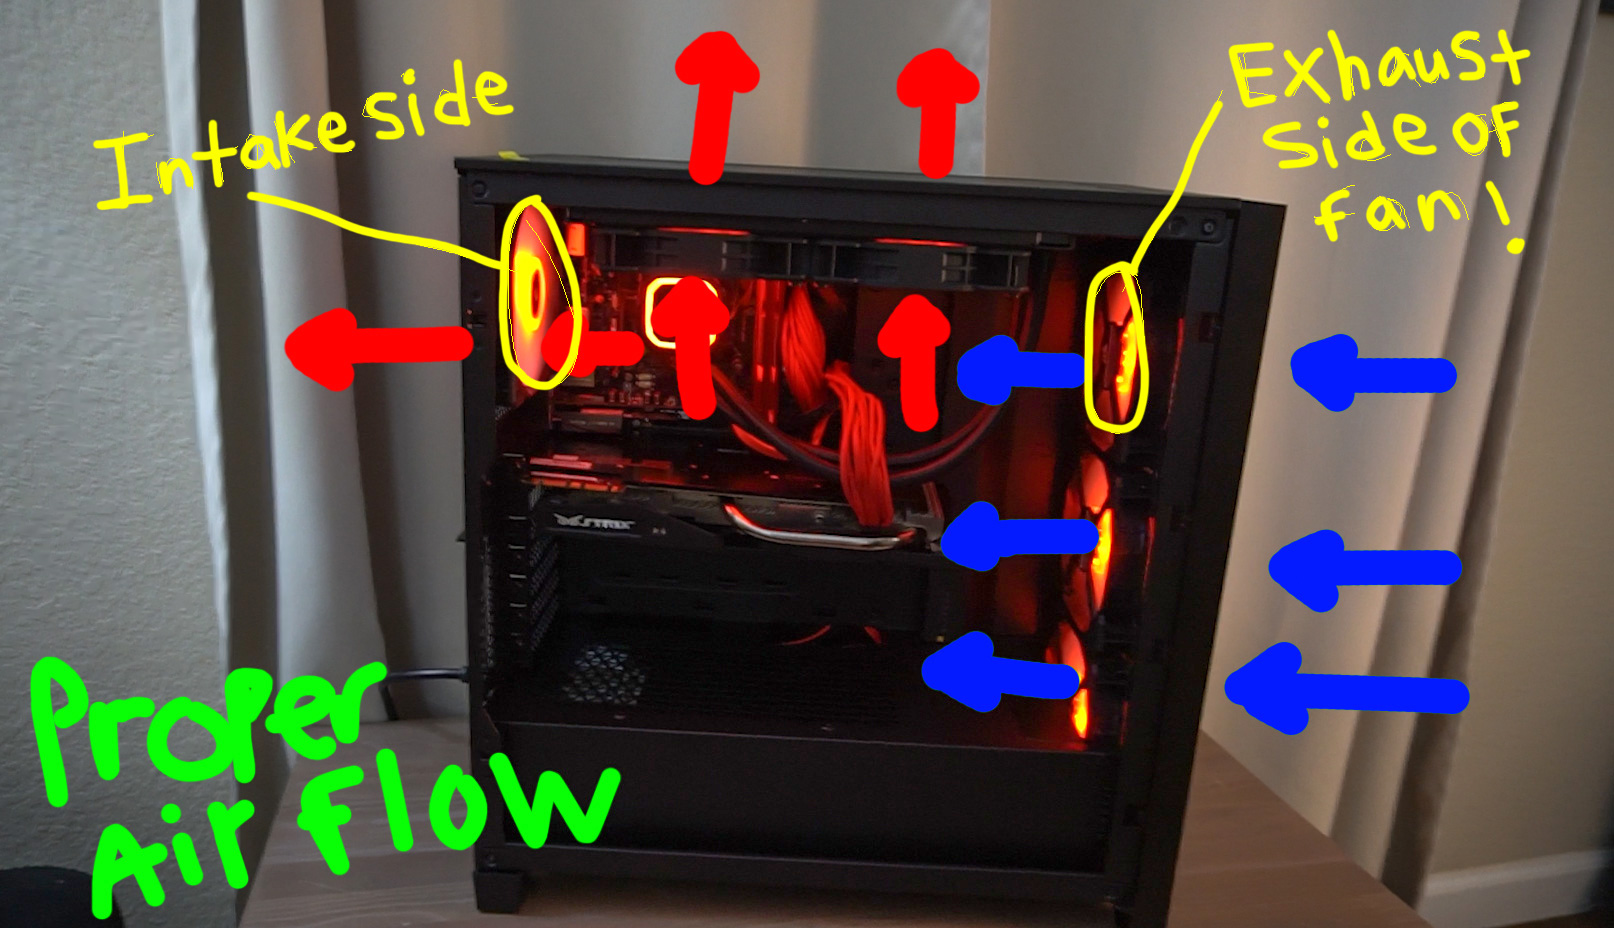
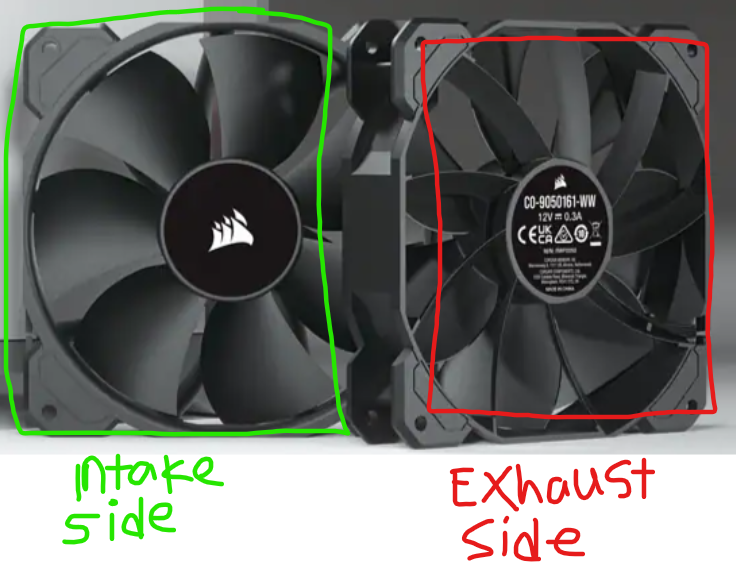
My ghetto ‘proper air flow’ config reference for those interested ->

Full parts breakdown + estimated cost  ->

$220 – Intel Core i7-4790K – Core i7 4th Gen Devil’s Canyon Quad-Core 4.0 GHz LGA 1150 88W Intel HD Graphics 4600 Desktop Processor – BX80646I74790K

$330 – Corsair PSU 850W CX Modular Builder Series, 80+ Bronze, CP-9020099-EU (Series, 80+ Bronze)

90$ – Corsair 4000D Airflow Tempered Glass Mid-Tower ATX PC Case – Black

90$ – Silicon Power 2TB SSD 3D NAND A55 SLC Cache Performance Boost SATA III 2.5″ 7mm (0.28″) Internal Solid State Drive (SU002TBSS3A55S25NE)

70$ – SAMSUNG 960 EVO M.2 250GB NVMe PCI-Express 3.0 x4 Internal Solid State Drive (SSD) MZ-V6E250BW

$50 – Seagate BarraCuda 2TB Internal Hard Drive HDD – 3.5 Inch SATA 6Gb/s 7200 RPM 256MB Cache 3.5-Inch – Frustration Free Packaging (ST2000DM008/ST2000DMZ08)

$150 – G.SKILL TridentX Series 16GB (2 x 8GB) DDR3 2400 (PC3 19200) Desktop Memory Model F3-2400C10D-16GTX

$230 – ASUS GeForce GTX 970 4GB GDDR5 PCI Express 3.0 SLI Support G-SYNC Support Video Card STRIX-GTX970-DC2OC-4GD5

$220 –  ASUS ROG MAXIMUS VII IMPACT LGA 1150 Intel Z97 HDMI SATA 6Gb/s USB 3.0 Mini ITX Intel Gaming Motherboard

$110 – CORSAIR iCUE H100i RGB PRO XT, 240mm Radiator, Dual 120mm PWM Fans, Software Control, Liquid CPU Cooler, CW-9060043-WW LGA 1700 Compatible

8$ – CRJ SATA to 3 x 3/4-Pin PWM Sleeved Fan Power Adapter Cable

68$ – Corsair AF Series AF120 LED (2018) CO-9050083-WW 120 mm Red LED Case Fan, 3-Pack.

$13.70 – Silverstone PP07-MBR Motherboard 24pin Connector Sleeved Extension Power Supply Cable