Let Zabbix Stay On Top Of Windows Updates Monitoring For You
Anyone looking for an efficient way to monitor their Windows Servers for updates and receive automatic alerts for any pending updates? Look no further!
In just a few simple steps, you can configure your Zabbix sever to monitor for Windows updates and alert you whenever any updates are detected.
Step-by-Step Guide to Monitoring Windows Updates with Zabbix
Step 1. Download and Install the Zabbix Agent
First, download the correct Zabbix agent .msi from the official Zabbix download page, and install it on your Windows server.
Recommended download parameters:
Zabbix agent version: Agent 2 version that matches your Zabbix server version
OS distro: Windows
OS version: Any
Hardware: amd64 (for 64-bit OS)
Zabbix version: Choose the version you’re running
Encryption: OpenSSL
Packaging: MSI
Step 2. Add PowerShell Scripts for Checking Windows Updates
Next, download and place your custom PowerShell scripts (used to check for Windows updates) in the following directory: C:\Program Files\Zabbix Agent 2\zabbix-agent-scripts
Important Note
If you are running into execution policy errors, you will need to set your systems execution policy to ‘unrestricted’ with this command:
Set-ExecutionPolicy Unrestricted -Scope CurrentUser
Otherwise your Powershell scripts will fail to run from Zabbix server. Highly recommend testing the Powershell scripts on your machine directly before moving on to next steps.
Step 3. Modify the Zabbix Agent Configuration
Edit the zabbix_agent2.conf file, located in: C:\Program Files\Zabbix Agent 2\
IMPORTANT NOTE – If you are NOT running ‘Zabbix Agent 2‘, then your directory path will instead be ‘C:\Program Files\Zabbix Agent\’. Ensure your directory path is correct otherwise your Zabbix server will not be able to make contact with your Zabbix script(s).
Pro Tip – Use a text editor like Notepad++ to modify the file.
Increase the timeout: Find the following block and add the last line to increase the timeout to 30 seconds.
### Option: Timeout
# Specifies timeout for communications (in seconds).
#
# Mandatory: no
# Range: 1-30
# Default:
# Timeout=3
Timeout=30
(Optional) Allow system.run commands: Find the “# DenyKey=system.run[*]” code block and add this line to the bottom: AllowKey=system.run[*]
Add User Parameters: find the “# UserParameter=” code block and add these lines to the bottom:
UserParameter=DaysSinceLastUpdate,powershell.exe -NoProfile -ExecutionPolicy bypass -File "C:\Program Files\Zabbix Agent 2\zabbix-agent-scripts\DaysSinceLastUpdate.ps1"
UserParameter=CountUninstalledUpdates,powershell.exe -NoProfile -ExecutionPolicy bypass -File "C:\Program Files\Zabbix Agent 2\zabbix-agent-scripts\CountUninstalledUpdates.ps1"
Restart Zabbix service on the windows server
Windows flag key + R on your keyboard to bring up Run then; services.msc>find ‘zabbix agent 2’ service>right click, restart
Step 4. Increase Timeout on Zabbix Server (if not already done)
If you haven’t already increased the timeout on your Zabbix server, do so by editing the zabbix_server.conf file: sudo vim /etc/zabbix/zabbix_server.conf
Look for the Timeout block and update it accordingly. After making changes, restart the Zabbix server: sudo systemctl restart zabbix-server
5. Create a New Item For Your Host In Zabbix Frontend
(note – if you haven’t created your host in Zabbix frontend yet, do so and then circle back to this step)
Navigate to the Items section for your host in Zabbix, and create a new item with the following parameters:
Name: Count Uninstalled Windows Updates
Type: Zabbix agent
Key: CountUninstalledUpdates
Type Of Information: Numeric (unsigned)
Host Interface: (Enter your host’s IP)
Update Interval: 1d
Increase item timeout to 30 seconds
Leave the rest of the parameters as default, and click Add to save the item.
6. Create a Trigger In Zabbix Frontend
Now, create a trigger to alert you when updates are available. In the Triggers section for your host, click Create Trigger with the following details:
Name: Windows Updates Available
Severity: High
Expression: max(/<hostname>/CountUninstalledUpdates,#1)>0
Note: be sure to replace ‘<hostname>’ with the actual hostname of your windows server
7. Add custom script to Zabbix frontend
This will give you the ability to query your Windows Server updates straight from Zabbix
– Navigate to the scripts section of your Zabbbix fronend. If you’re in Zabbix v7, it can be found on the left side column tool bar under alerts>scripts>create script
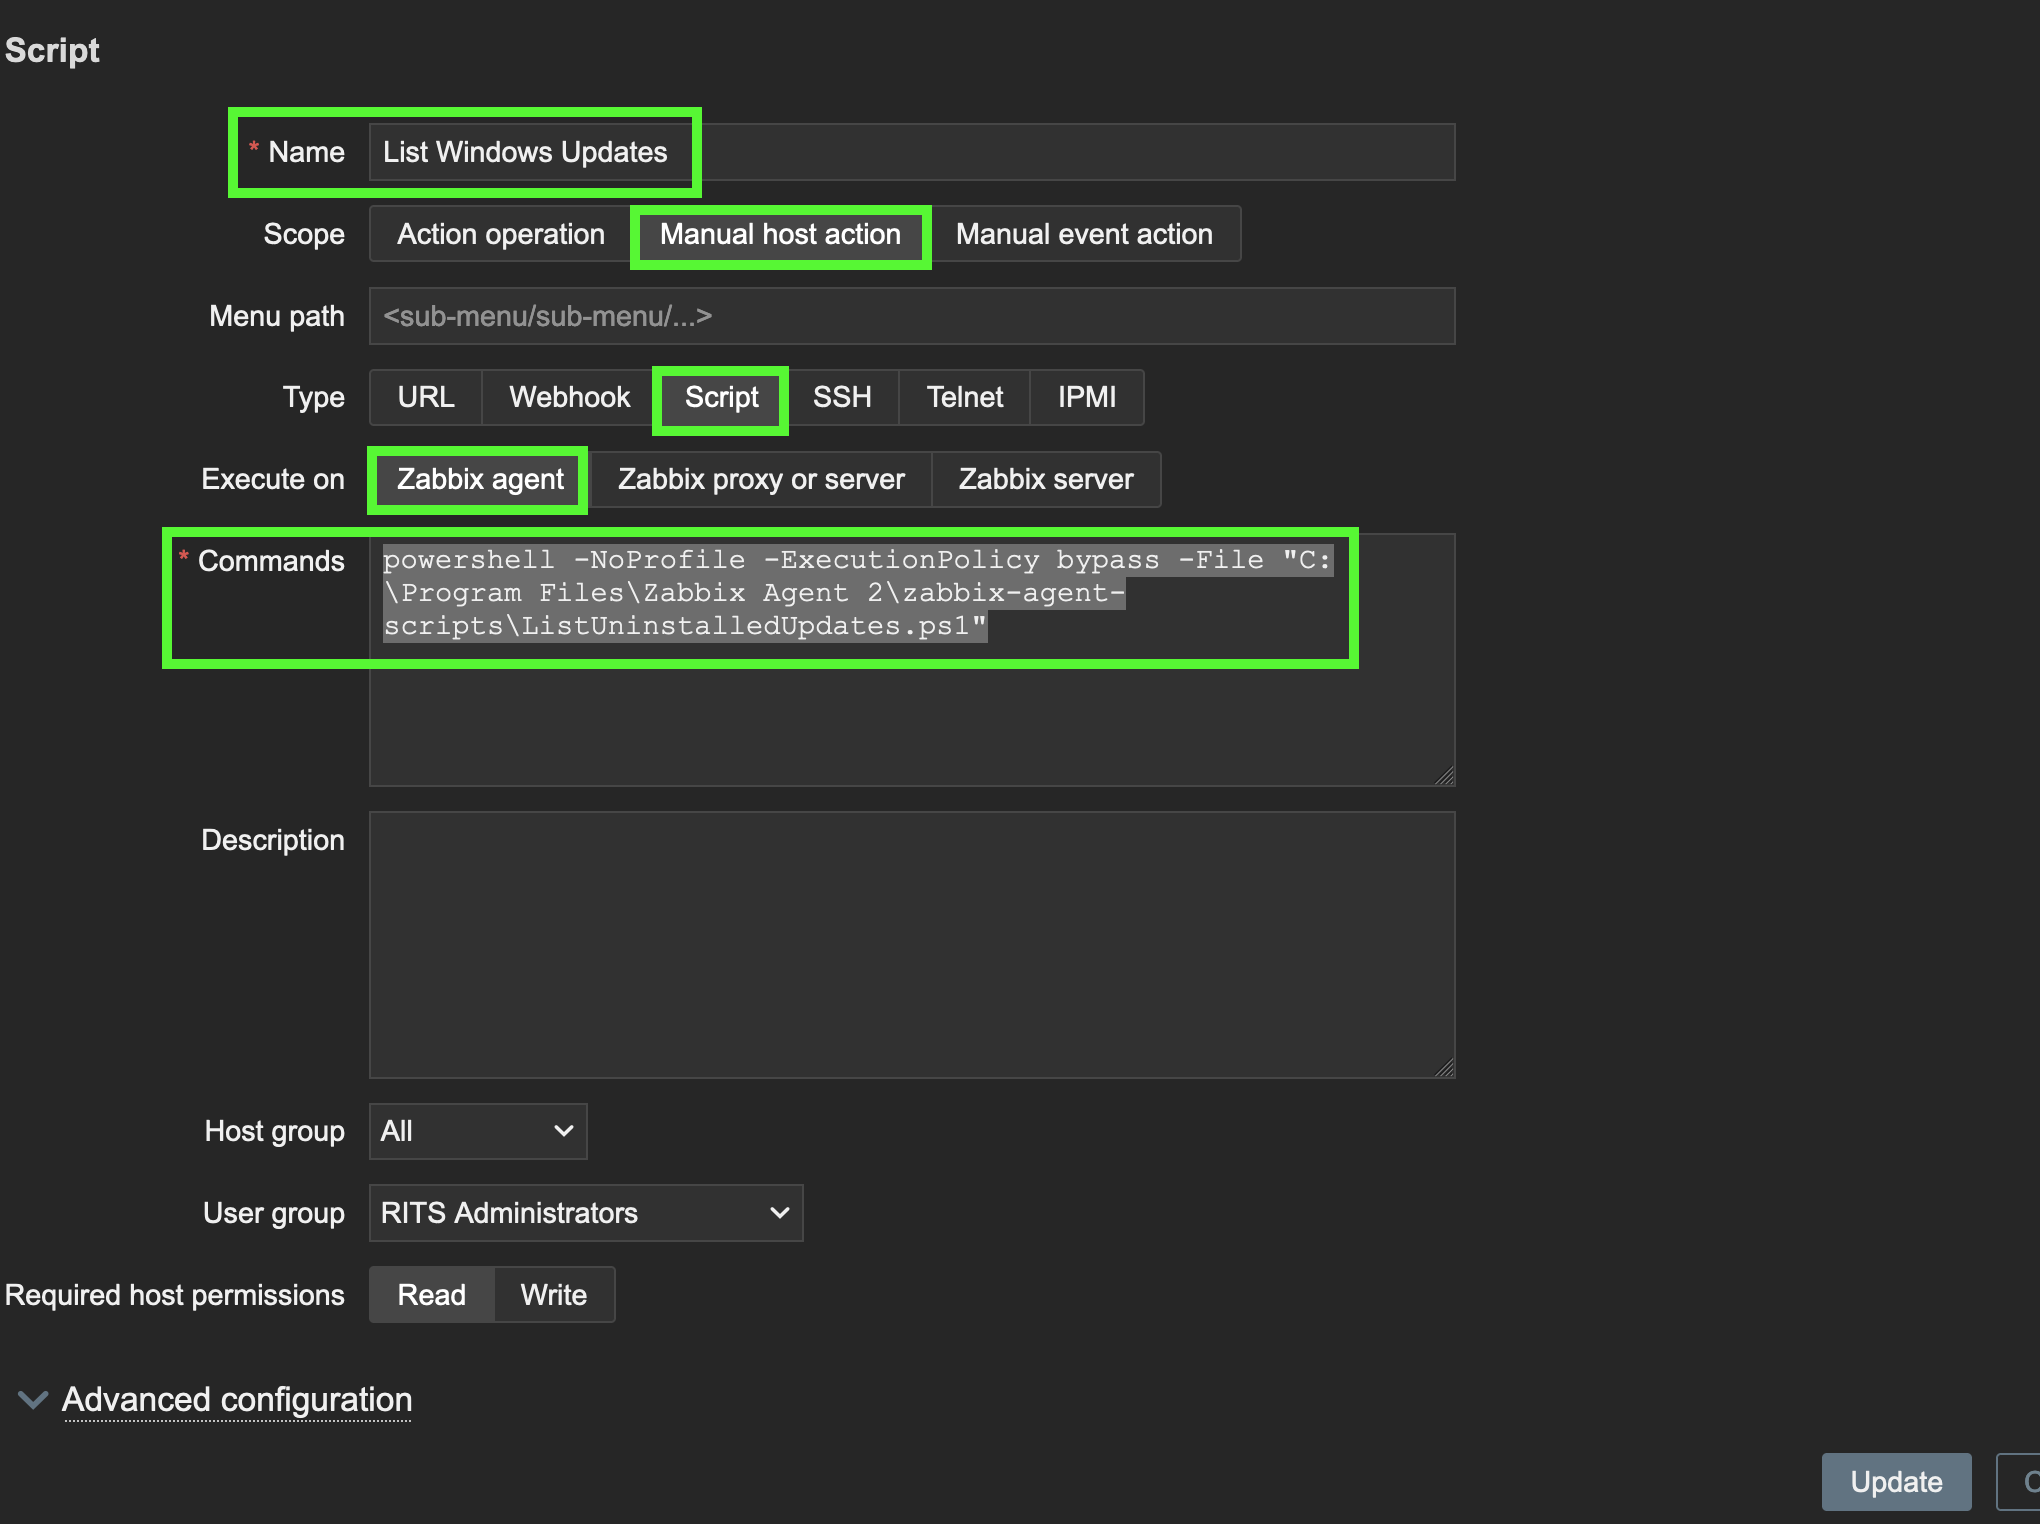
Here is the command:
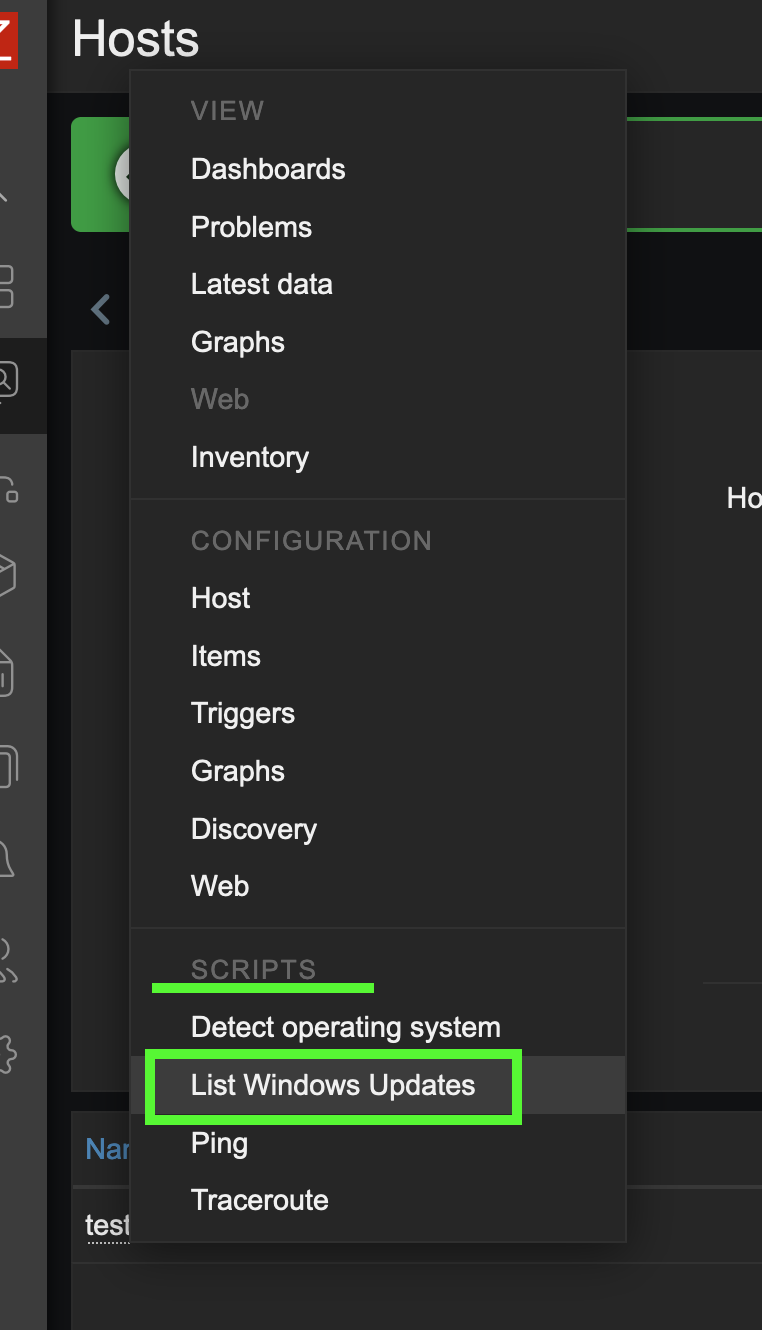
powershell -NoProfile -ExecutionPolicy bypass -File "C:\Program Files\Zabbix Agent 2\zabbix-agent-scripts\ListUninstalledUpdates.ps1"If configured correctly, you can now query your windows server for Microsoft updates straight from your Zabbix frontend by going to monitoring>hosts>left click on your windows server host and under scripts, select ‘List Windows Updates’