Set Up Your Own Internally Hosted Private Wiki On Ubuntu Server

We used DokuWiki to create and host our own internal Wiki on the latest version of Ubuntu Server (22.04.1 at the time of this writing). How cool is this? We’ll, it’s actually more than just ‘cool’ and can make for an invaluable tool used to centrally store crucial information while making it conveniently accessible to you and your teams.

If you’re new to DokuWiki and unfamiliar with PHP, installation and setup can be a daunting task. But not to worry because today we are going to fly you through installation step by step and as a bonus, show you the basics to get your Wiki up and running in no time.

From the horses mouth ->

DokuWiki is a simple to use and highly versatile Open Source wiki software that doesn’t require a database. It is loved by users for its clean and readable syntax. The ease of maintenance, backup and integration makes it an administrator’s favorite. Built in access controls and authentication connectors make DokuWiki especially useful in the enterprise context and the large number of plugins contributed by its vibrant community allow for a broad range of use cases beyond a traditional wiki.

Full list of installation commands ->

1 – Update System
sudo apt-get update

2 – Install Apache And PHP
sudo apt-get install apache2 php php-gd php-xml php-json -y

3 – Start Apache Service
systemctl start apache2
systemctl enable apache2

4 – Install DokuWiki
cd /var/www
sudo wget https://download.dokuwiki.org/src/dokuwiki/dokuwiki-stable.tgz
sudo tar xvf dokuwiki-stable.tgz
sudo mv dokuwiki-*/ dokuwiki

5 – Change Permissions
sudo chown -R www-data:www-data /var/www/dokuwiki

6 – Change Document Root In Apache To Point To /var/www/dokuwiki
sudo vim /etc/apache2/sites-enabled/000*.conf

Replace
DocumentRoot /var/www/html
with
DocumentRoot /var/www/dokuwiki

7 – Change AllowOverrides Setting In Apache2 To Use .htaccess files For Security
sudo vim /etc/apache2/apache2.conf

For directory /var/www/ replace
AllowOverride None
with
AllowOverride All

8 – Restart Apache2 Service
sudo service apache2 restart

9 – Visit http://IP-address-of-your-server/install.php to initially configure your DokuWiki.

10 – Delete The Install.php File After Finished Installing
sudo rm /var/www/dokuwiki/install.php


Ultraviewer – Best FREE TeamViewer Alternative?

Seeking a FREE remote support software comparable to TeamViewer? We’ll look no further than Ultraviewer.Think of it as the free generic light weight version of TeamViewer.

Ultraviewer is safe, easy to use and FREE

Every rose has it’s thorns though right? So naturally, we did discover some weaknesses in security and a few other rather, lack luster features during analysis ->

  • Unable to permanently disable random generated password and force 100% reliance on the custom password
  • Logging files are non-protected and open to manipulation to standard users
    (should be locked down to administrators only)
  • Connection to Ultraviewer server(s) use a non-secure deprecated version of TLS (TLSv1)
  • No keyboard/mouse lock functionality on the remote endpoint
    (definitely useful to be able to lock the remote mouse and keyboard when connected to a user computer so you’re not fighting them for control)
  • Lacking support for 2 factor authentication (not necessarily a deal breaker but optimal for highly secure environments)

Please note – our review was based upon the free version of Ultraviewer and we cannot speak for the the paid version at this time.

Overall, we can definitely appreciate Ultraviewer and will keep a place for it in our toolkit, however, and at this time, we do not recommend the use of Ultraviewer for professional highly secure use cases and environments.

Check out the full review and break down below ->


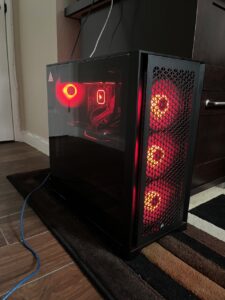
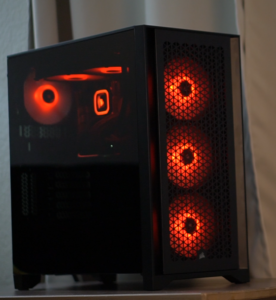
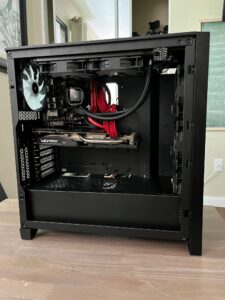
The ‘Bumble Bee’ 2022 Gaming PC

Just wanted to share our 2022 new gaming PC build we call the ‘Bumble Bee’. Great build for media content creation and gaming.

How much? At the time of this writing, you can snag up this entire PC for an estimated $2,284.00 which is a fantastic deal, considering the high power components you will get.

Why name it ‘Bumble Bee’? Color scheme = black and yellow which is representative of a Bumble Bee

Overclocked? Yes all core overclock to 5.2Ghz stable, no crashing and maxing at 80c under load. Note – an all core over clock applies to all the cores on your processor which = higher performing + higher temps versus only overclocking some of your cores for lower performance and lower temps

Full specs ->